In this post, we will see how to implement MVVM pattern in SwiftUI.
But, what is MVVM pattern?
From wikipedia:
“Model–view–viewmodel (MVVM) is a software architectural pattern that facilitates the separation of the development of the graphical user interface (the view) – be it via a markup language or GUI code – from the development of the business logic or back-end logic (the model) so that the view is not dependent on any specific model platform. The viewmodel of MVVM is a value converter, meaning the viewmodel is responsible for exposing (converting) the data objects from the model in such a way that objects are easily managed and presented. In this respect, the viewmodel is more model than view, and handles most if not all of the view’s display logic. The view model may implement a mediator pattern, organizing access to the back-end logic around the set of use cases supported by the view.“
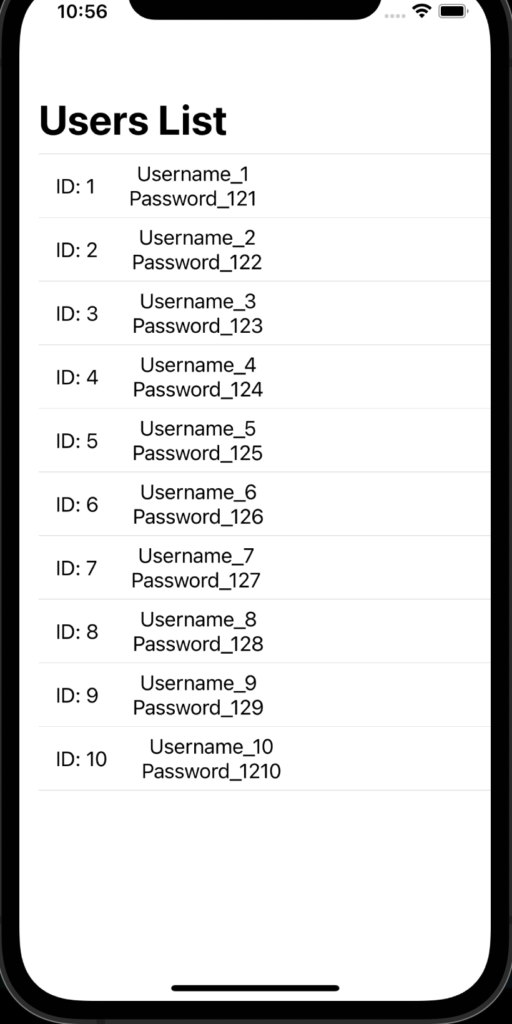
Let’s see how to create a simple list of Users using this pattern:
we start creating an iOS application, where we will define the MVVM components:
[MODEL – USER.SWIFT]
This is the Struct used to define the User entity.
import Foundation

struct User: Identifiable {
    var id: Int
    var Username:String
    var Password:String
}
[VIEW MODEL – USERVIEWMODEL.SWIFT]
This is the Class used to define all methods to manage the object User (in this case, we have only a method to get the list of Users but, in a real project, here we should define all methods to manage the CRUD operations).
import Foundation

class UserViewModel {

    private var lstUser = [User]()

    // constructor
    init() {
        // here, we feed the list of users
        for index in 1...10 {
            lstUser.append(User(id: index, Username: "Username_\(index)", Password: "Password_12\(index)"))
        }
    }

    func GetAllUsers() -> [User] {
        return lstUser
    }
}
[VIEW – CONTENTVIEW.SWIFT]
This is the Struct used to define the UI.
import SwiftUI

// OBVIOUSLY, IN THIS POST THE UI STYLE IT ISN'T THE MAIN GOAL!

struct ContentView: View {
    @State var viewModel = UserViewModel()
    var body: some View {
        NavigationView{
            // we call the method GetAllUsers
            List(viewModel.GetAllUsers()) { item in
                        HStack {
                            Text("ID: \(item.id)")
                            VStack {
                                Text(item.Username)
                                Text(item.Password)
                            }.padding(.leading, 20)
                        }.padding(.leading, 10)
                    }.navigationBarTitle("Users List")
                }
    }
}

struct ContentView_Previews: PreviewProvider {
    static var previews: some View {
        ContentView()
    }
}
We have done and now, if we run the application, this will be the result:
