This is the first Post of a series of three where, we will see what Streamlit is and how we can use it in our projects.
As Python developers, we often need to create user interfaces for our projects, dashboards or internal tools. While frameworks like Flask or Django are powerful, they require significant code and frontend knowledge. In this case, we can use Streamlit, an open-source Python library that allows us to create beautiful and interactive web applications with Python scripts.
For all information, this is the official web site.
Installation
We install Streamlit using the command:
pip install streamlit
Once installed, we can verify the installation by running the command:
streamlit hello
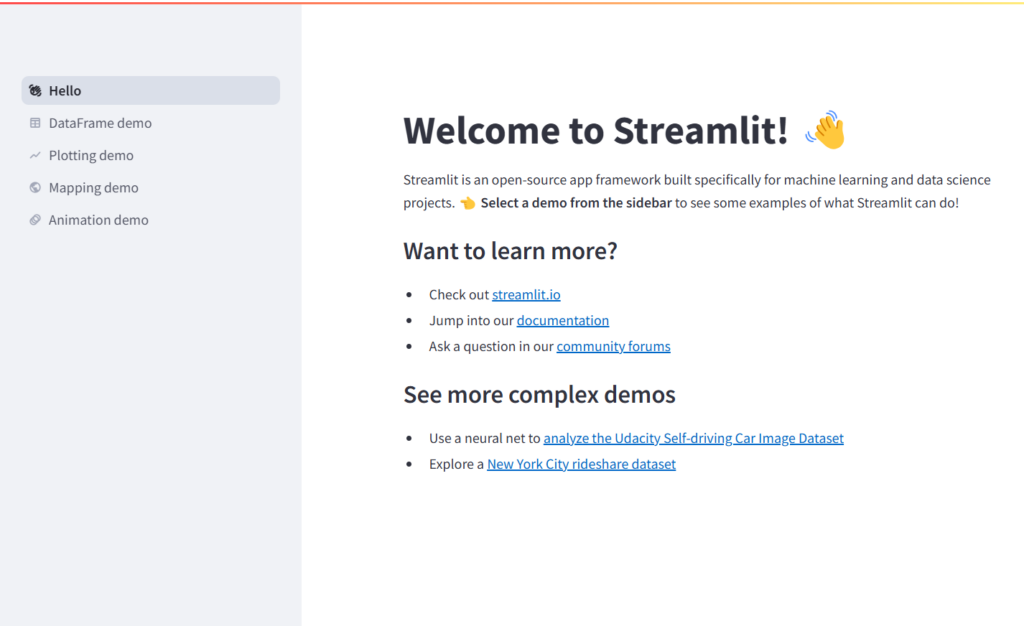
This command launches a sample app to showcase Streamlit’s features:

Let’s build a simple app that display a title, some texts and a slider:
1 2 3 4 5 6 7 8 9 10 11 12 13 14 15 16 17 18 19 20 21 22 23 | import streamlit as st# Add a Title to the appst.title("Welcome to the Streamlit Tutorial!")# Add a Header below the titlest.header("This is an header")# Add an empty line to create space between the header and the textst.write("")# Add a Text instructionst.write("Select a value from 1 to 100")# Add a Slider to select a value between 1 and 100# The default value is set to 50valueSlider = st.slider("Values:", min_value=1, max_value=100, value=50)# Add another empty line to create space between the slider and the subheaderst.write("")# Add a Subheader to display the selected value from the sliderst.subheader(f"You selected: {valueSlider}") |
Now, we can run the app using the command:
streamlit run <file name>

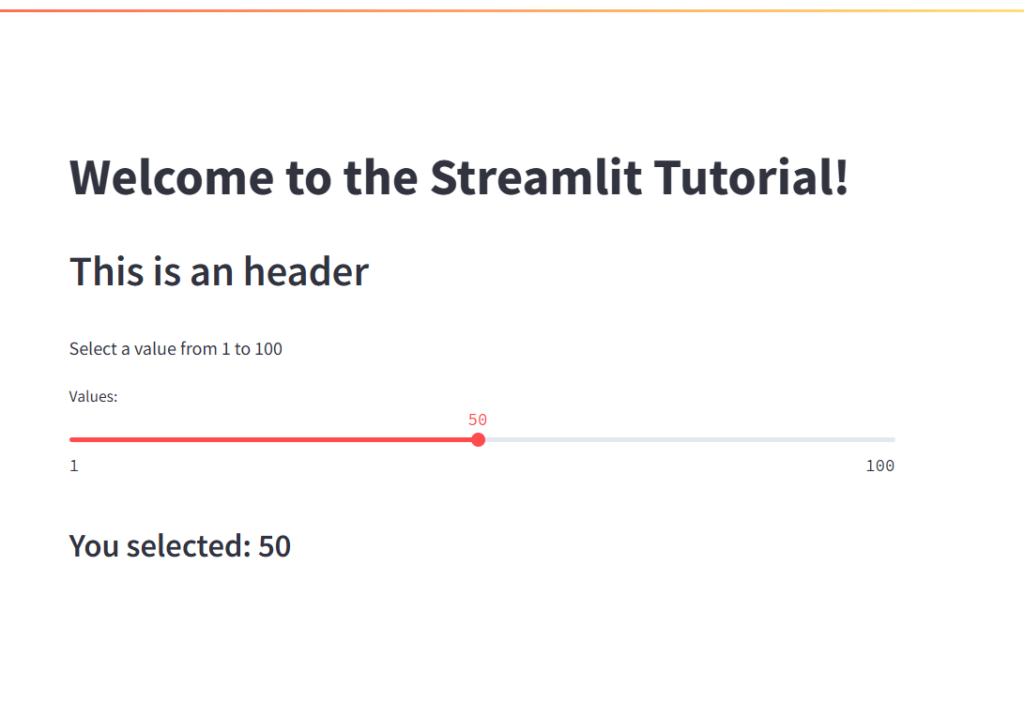

Before concluding this introductory post on Streamlit, I would like to show some more basic features of Streamlit that we can use in our projects::
Text Input:
1 2 | name = st.text_input('Enter your name')st.write(f'Hello, {name}!') |


Button:
1 2 3 4 5 6 | # Create a input box for the user to enter the namename = st.text_input("What is your name?")# Create a button to submit the nameif st.button("Submit"): # Display the message st.write(f"Hello, {name}!") |


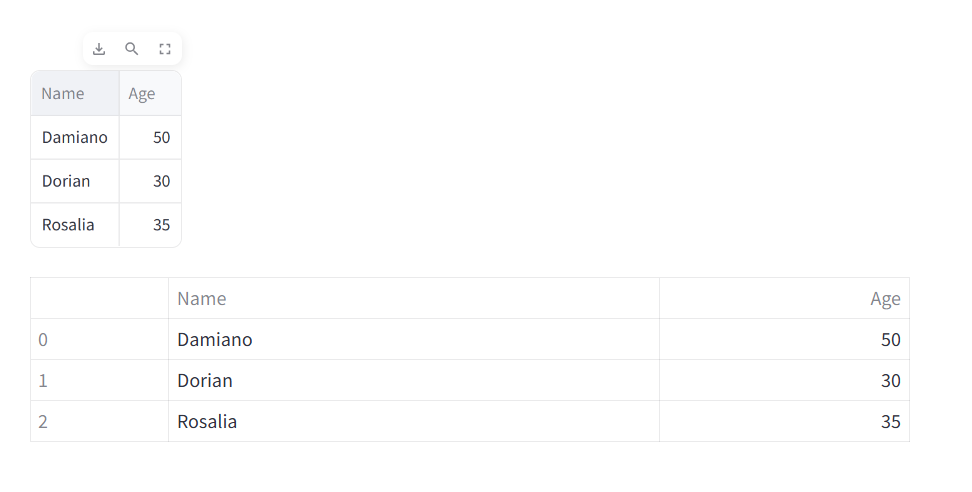
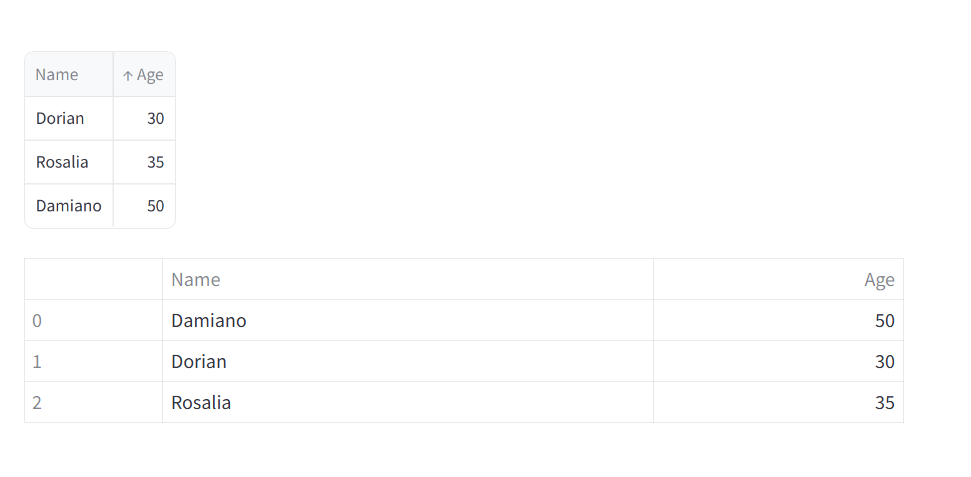
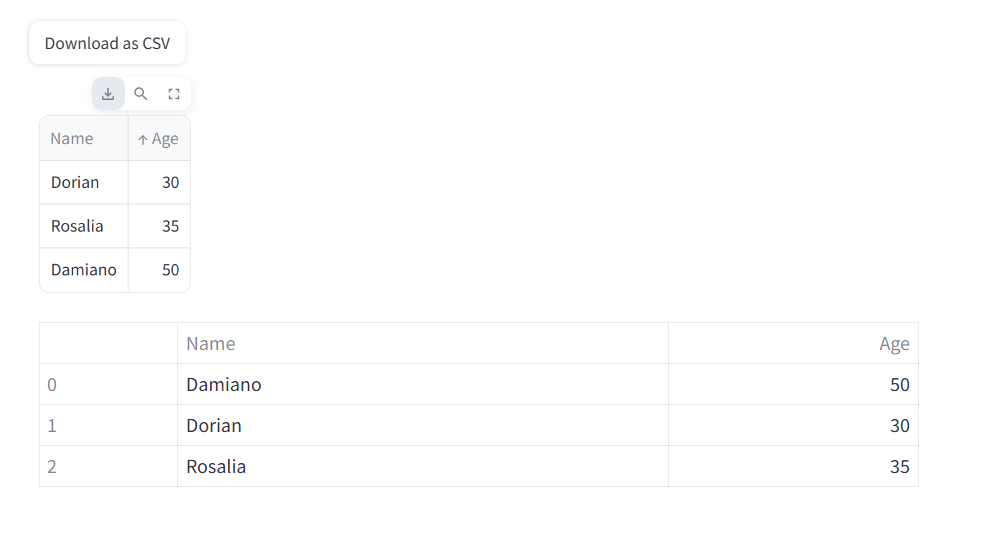
Data Display:
1 2 3 4 5 6 7 8 9 10 11 12 13 | import streamlit as stimport pandas as pd # Install using `pip install pandas`# Sample datadata = {"Name": ["Damiano", "Dorian", "Rosalia"], "Age": [50, 30, 35]}# Create a DataFrame (dataframe is a 2D table)df = pd.DataFrame(data)# With Interactive table, we can sort, filter, search and download the datast.dataframe(df, hide_index=True) # Interactive table without index# With Static table, we can only view the datast.table(df) # Static table |
Streamlit is a powerful tool for building interactive web apps with Python. In this post, we covered the basics of installation and creating a simple app. In the next posts, we’ll see more advanced Streamlit components and how to create rich, interactive user interfaces.