In this post, we will see how to use Grid, the new container view introduced in iOS 16 that allows us to create simple, yet flexible layouts.
It is similar to the LazyVGrid and LazyHGrid views but, it is designed to be easier to use for simpler layouts.
To create a Grid view, we simply specify the number of columns and rows that we want and then, add child views to each cell. The child views can be of any type but, they should all be the same size.
Grid views are automatically sized to fit their contents and, they can be used to create a variety of layouts.
For all informations, we can consult the Apple developer web site.
Let’s see some examples:
2×2 GRID
import SwiftUI

struct ContentView: View {
    var body: some View {
        Grid() {
            GridRow {
                Text("Text1 up Left")
                Image(systemName: "trash")
            }
            GridRow {
                Image(systemName: "xmark")
                Text("Text2 down right ")
            }
        }
    }
}

#Preview {
    ContentView()
}
If we run the application, the following will be the result:

5×5 GRID
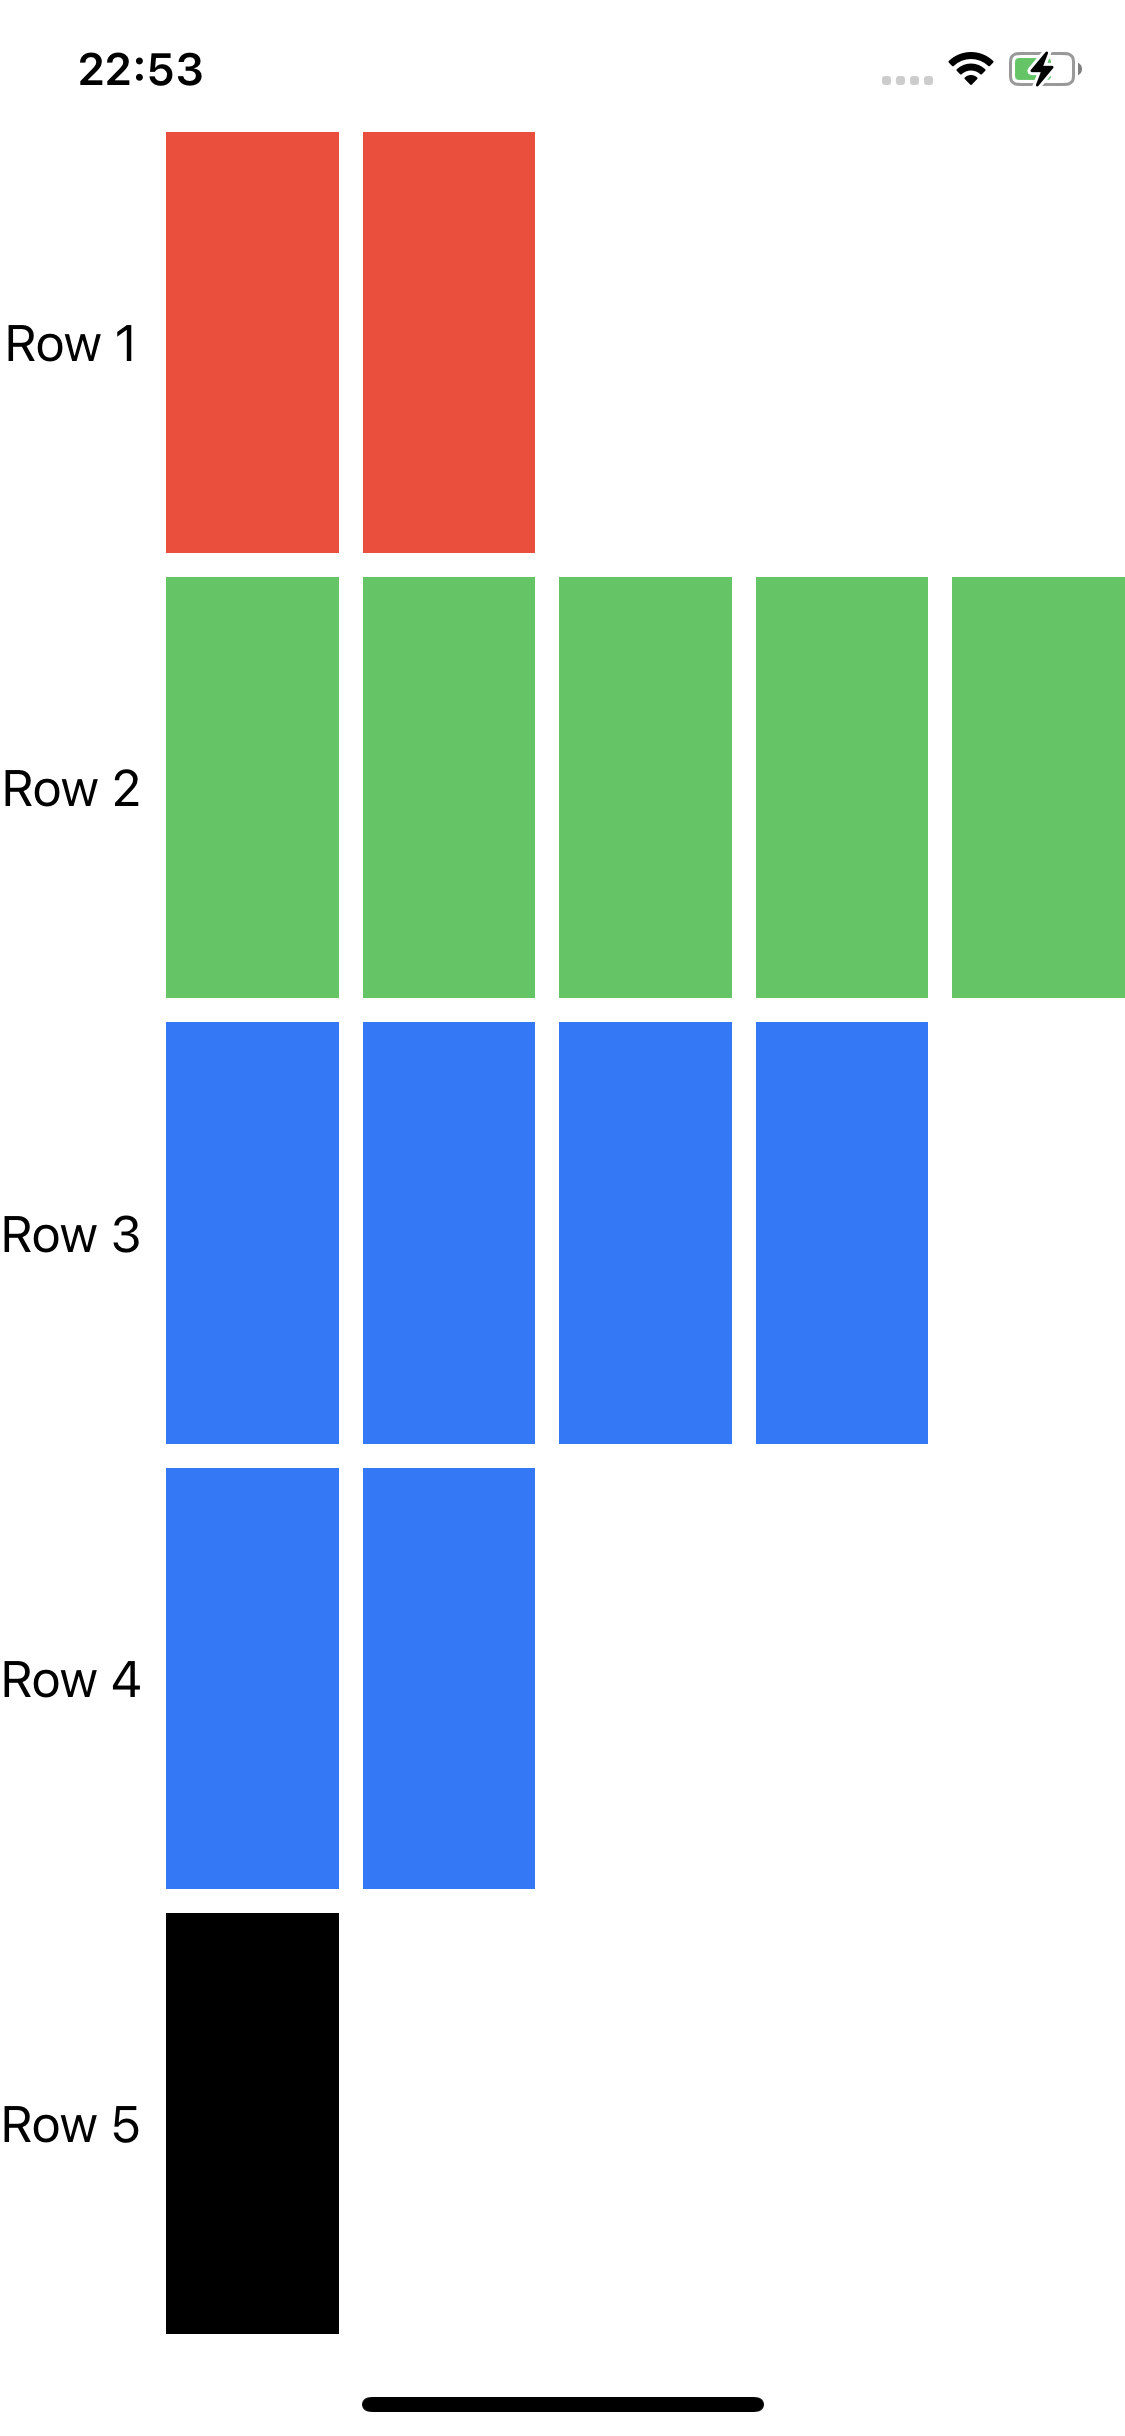
The grid’s column count grows to handle the row with the largest number of columns. If we create rows with different numbers of columns, the grid adds empty cells to the trailing edge of rows that have fewer columns. The example below creates five rows with different column counts:
import SwiftUI

struct ContentView: View {
    var body: some View {
        Grid() {
            GridRow {
                // 3 Columns
                Text("Row 1")
                ForEach(0..<2) { _ in Color.red }
            }
            GridRow {
                // 6 Columns
                Text("Row 2")
                ForEach(0..<5) { _ in Color.green }
            }
            GridRow {
                // 5 Columns
                Text("Row 3")
                ForEach(0..<4) { _ in Color.blue }
            }
            GridRow {
                // 3 Columns
                Text("Row 4")
                ForEach(0..<2) { _ in Color.blue }
            }
            GridRow {
                // 2 Columns
                Text("Row 5")
                Color.black
            }
        }
    }
}

#Preview {
    ContentView()
}
If we run the application, the following will be the result:
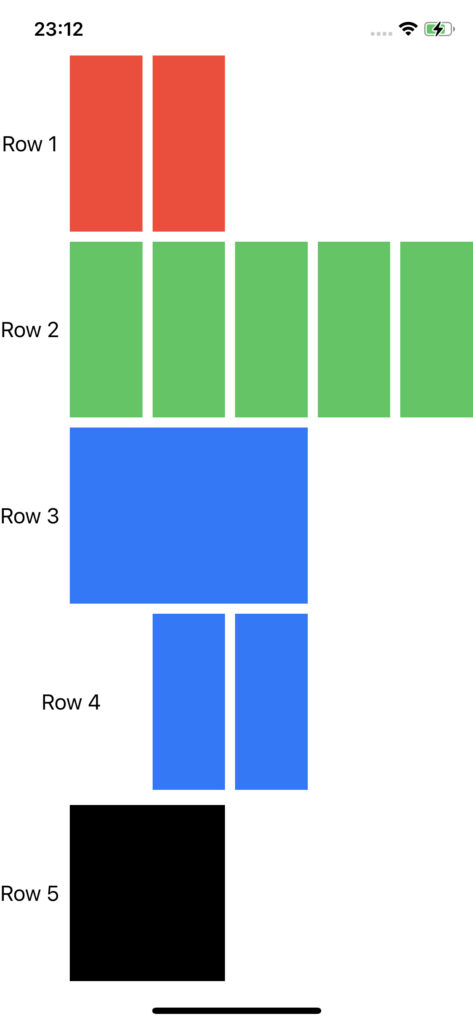
MERGE CELL
import SwiftUI

struct ContentView: View {
    var body: some View {
        Grid() {
            GridRow {
                // 3 Columns
                Text("Row 1")
                ForEach(0..<2) { _ in Color.red }
            }
            GridRow {
                // 6 Columns
                Text("Row 2")
                ForEach(0..<5) { _ in Color.green }
            }
            GridRow {
                // 2 Columns
                Text("Row 3")
                Color.blue.gridCellColumns(3)
            }
            GridRow {
                // 3 Columns
                Text("Row 4").gridCellColumns(2)
                ForEach(0..<2) { _ in Color.blue }
            }
            GridRow {
                // 2 Columns
                Text("Row 5")
                Color.black.gridCellColumns(2)
            }
        }
    }
}

#Preview {
    ContentView()
}
If we run the application, the following will be the result:
CELL SPACING AND ALIGNMENT
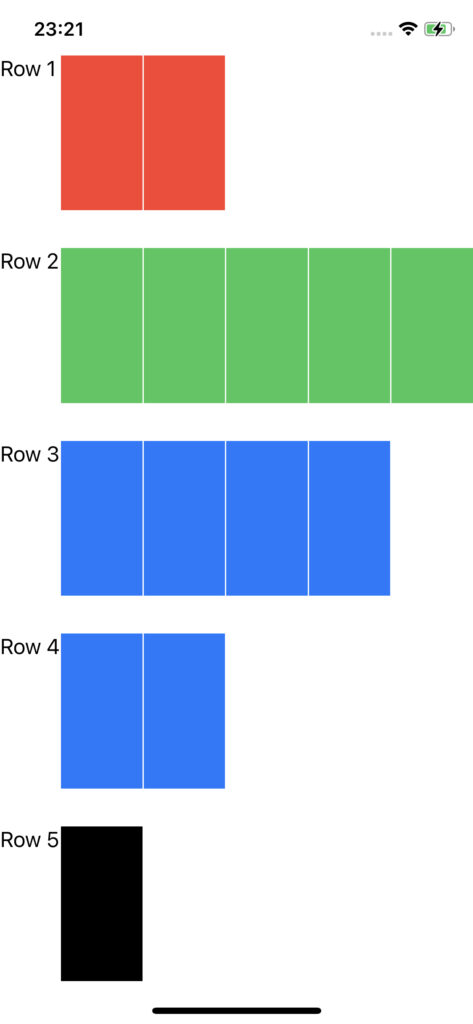
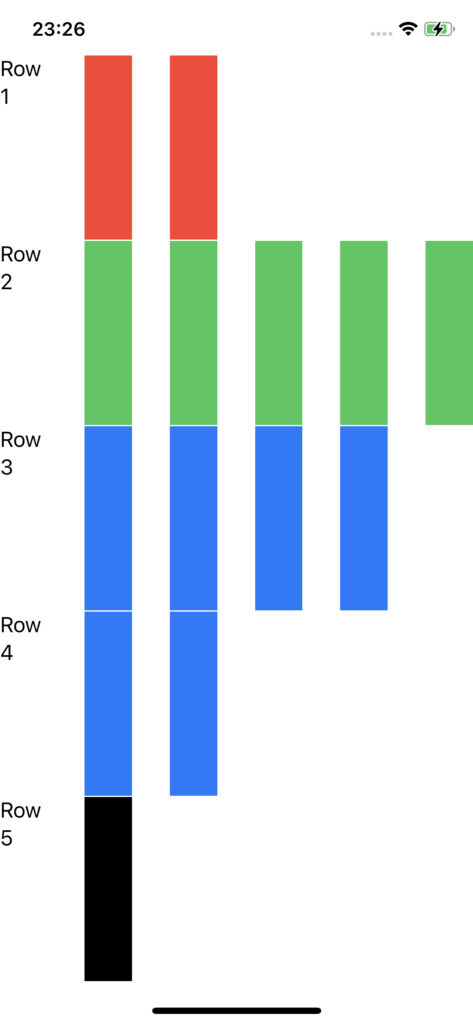
We can control the spacing between cells in both the horizontal and vertical dimensions and, set a default alignment for the content in all the grid cells when we initialize the grid:
import SwiftUI

struct ContentView: View {
    var body: some View {
        Grid(alignment: .topLeading,
             horizontalSpacing: 1,
             verticalSpacing: 30) {
            GridRow {
                // 3 Columns
                Text("Row 1")
                ForEach(0..<2) { _ in Color.red }
            }
            GridRow {
                // 6 Columns
                Text("Row 2")
                ForEach(0..<5) { _ in Color.green }
            }
            GridRow {
                // 5 Columns
                Text("Row 3")
                ForEach(0..<4) { _ in Color.blue }
            }
            GridRow {
                // 3 Columns
                Text("Row 4")
                ForEach(0..<2) { _ in Color.blue }
            }
            GridRow {
                // 2 Columns
                Text("Row 5")
                Color.black
            }
        }
    }
}

#Preview {
    ContentView()
}
import SwiftUI

struct ContentView: View {
    var body: some View {
        Grid(alignment: .topLeading,
             horizontalSpacing: 30,
             verticalSpacing: 1) {
            GridRow {
                // 3 Columns
                Text("Row 1")
                ForEach(0..<2) { _ in Color.red }
            }
            GridRow {
                // 6 Columns
                Text("Row 2")
                ForEach(0..<5) { _ in Color.green }
            }
            GridRow {
                // 5 Columns
                Text("Row 3")
                ForEach(0..<4) { _ in Color.blue }
            }
            GridRow {
                // 3 Columns
                Text("Row 4")
                ForEach(0..<2) { _ in Color.blue }
            }
            GridRow {
                // 2 Columns
                Text("Row 5")
                Color.black
            }
        }
    }
}

#Preview {
    ContentView()
}
FORM DATA
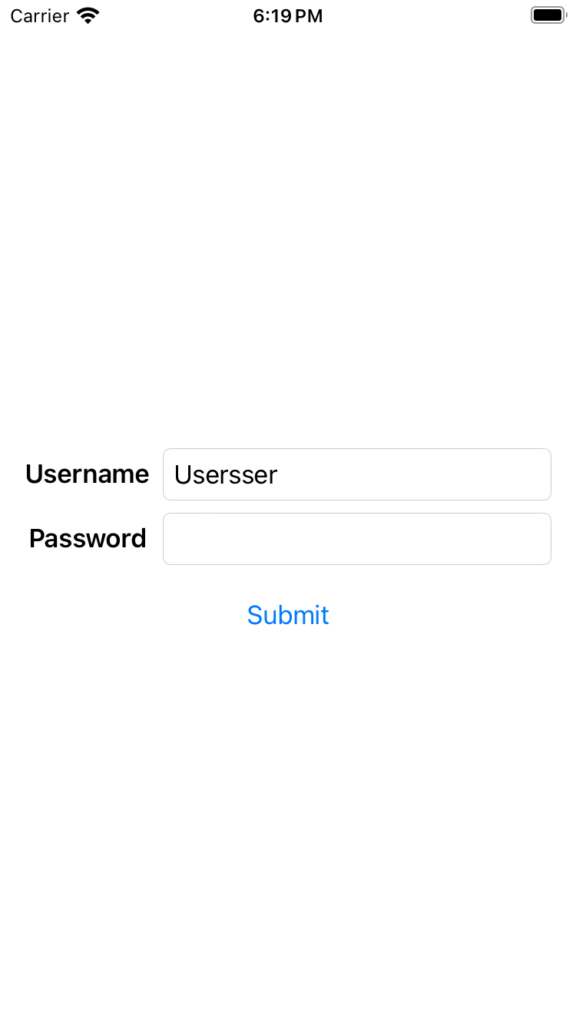
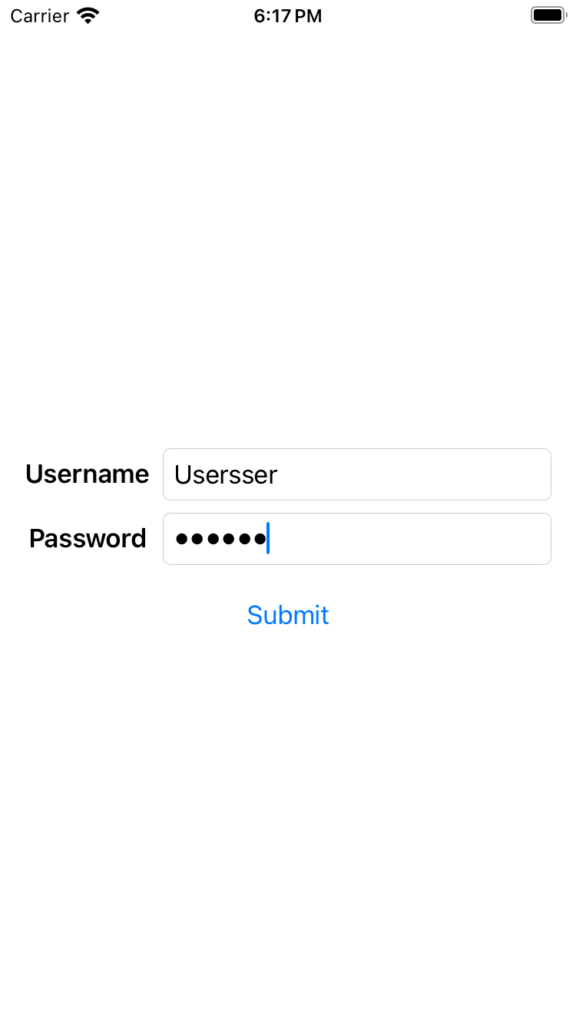
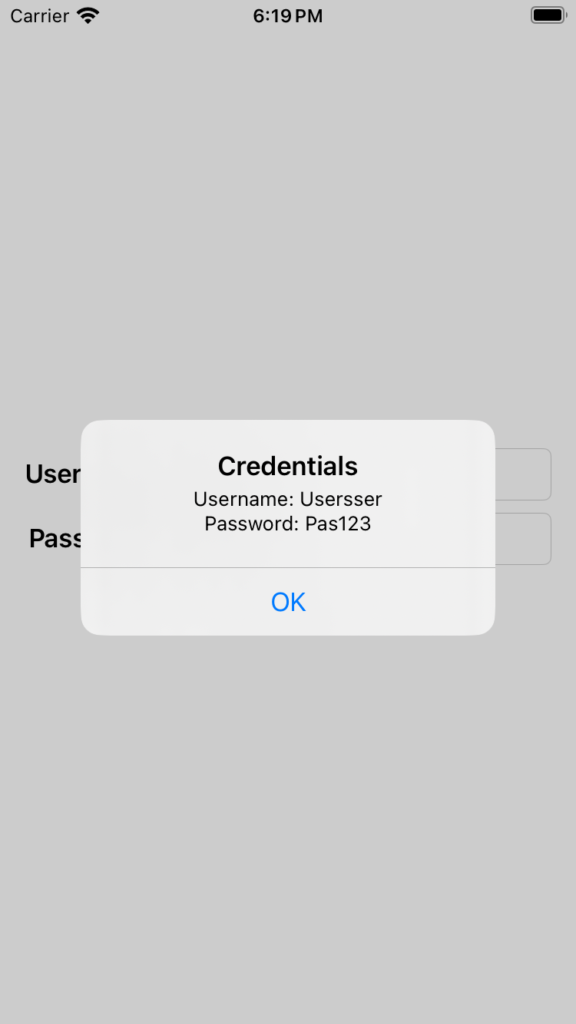
In this last example, we will see how to use Grid to develop a Form data:
import SwiftUI

struct ContentView: View {

    @State private var username: String = ""  // State for username text field
    @State private var password: String = ""  // State for password text field
    @State private var showAlert: Bool = false  // State to control the display of the alert

        var body: some View {
            Grid {
                GridRow {
                    Text("Username")
                        .font(.headline)  // Apply headline font style to the label
                    TextField("Enter your username", text: $username)
                        .textFieldStyle(RoundedBorderTextFieldStyle())  // Apply rounded border style to the text field
                }
                GridRow {
                    Text("Password")
                        .font(.headline)  // Apply headline font style to the label
                    SecureField("Enter your password", text: $password)
                        .textFieldStyle(RoundedBorderTextFieldStyle())  // Apply rounded border style to the secure field
                }
            }
            .padding()
                    Button(action: {
                        showAlert = true  // Set showAlert to true when the button is pressed
                    }) {
                        Text("Submit")
                    }
                    .alert(isPresented: $showAlert) {
                        Alert(title: Text("Credentials"),
                              message: Text("Username: \(username)\nPassword: \(password)"),
                              dismissButton: .default(Text("OK")))
                    }
        }
    }

#Preview {
    ContentView()
}
If we run the application, the following will be the result:
