In this post, we will see how to create a TabView, used to show two different Pages.
We start, creating two SwiftUI views called Page1 and Page2:
[PAGE1.SWIFT]
import SwiftUI

struct Page1: View {
    var body: some View {
        ZStack {
            // Definition background color
            Color.yellow.edgesIgnoringSafeArea(.all)
            Text("Page 1")
                .bold()
                .foregroundColor(.blue)
                .font(.system(size: 30))
        }
    }
}

struct Page1_Previews: PreviewProvider {
    static var previews: some View {
        Page1()
    }
}
[Page2.swift]
import SwiftUI

struct Page2: View {
    var body: some View {
        ZStack {
            // Definition background color
            Color.blue.edgesIgnoringSafeArea(.all)
            Text("Page 2")
                .bold()
                .foregroundColor(.yellow)
                .font(.system(size: 30))
        }
    }
}

struct Page2_Previews: PreviewProvider {
    static var previews: some View {
        Page2()
    }
}

Then, we will add another SwiftUI view called TabMenu where, we will define the TabView:
[TABMENU.SWIFT]
import SwiftUI

struct TabMenu: View {
    init() {
        UITabBar.appearance().barTintColor = UIColor.purple
    }

    var body: some View {
        // definition of TabView
        TabView{
            // definition of the first Item
            // linked with the view called Page1
            Page1()
                .tabItem{
                Text("Page1")
                Image(systemName: "shield.fill")
            }

            // definition of the second Item
            // linked with the view called Page2
            Page2()
                .tabItem{
                Text("Page2")
                Image(systemName: "cube.box.fill")
            }
        }
        .edgesIgnoringSafeArea(.top)
        .accentColor(.green)
    }
}

struct TabMenu_Previews: PreviewProvider {
    static var previews: some View {
        TabMenu()
    }
}
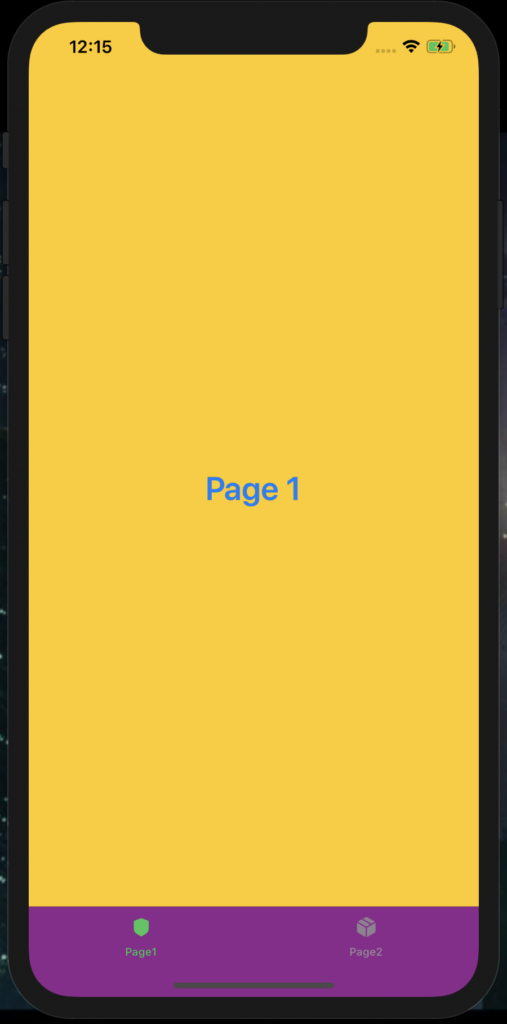
We have done and, if we run the application, this will be the result: